Add the Event to Google Calendar via Notion
I’ve been using Notion for a while now, and I really like it. It allows me to do many things and customize the layout according to my tasks or personal preferences. However, there’s one feature that many users want but is still missing in Notion: the ability to update our own activities to Google Calendar. So, I went looking for a solution on the internet, and there are quite a few methods available. Today, I’d like to share the method I’ve been using in case anyone else wants to try it out.
How to do it?
Actually, updating activities directly from Notion to Google Calendar is not possible yet. However, I use a tool called Zapier to connect the two. With Zapier, you can even set up a two-way sync, so updates made on one side will be reflected on the other. If you haven’t used it before, you can sign up for free at Zapier.
Create a Notion Table View Database
First, I created a Table View database to store our activities. The essential fields you need are the date and time. Other fields can be customized as you wish. For those who are unfamiliar with Table View databases, you can check out more information here: Notion Table View Databases.
Connect Google Calendar + Notion
Once you have Zapier, you can easily connect Google Calendar and Notion. Zapier provides a user-friendly wizard to help you set it up, and there are many flows to choose from. You can explore them here: Zapier Google Calendar Integrations. The one I’m using is “Quick add events to Google Calendar when new items are added to Notion databases.” If you’re using the free version of Zapier, the trigger will run every 15 minutes.
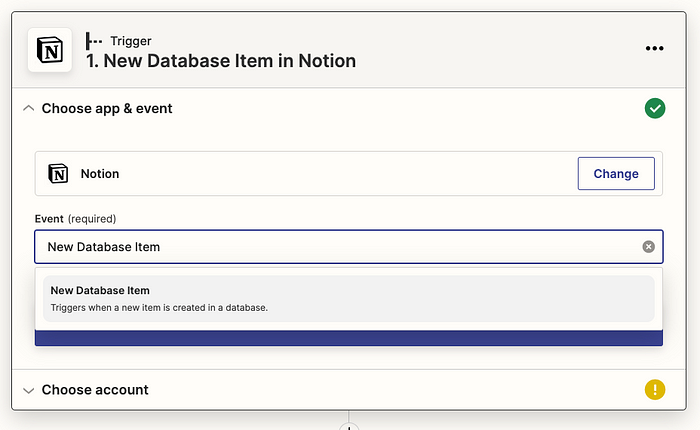
Next, click on “Try this Zap.” Zapier will start a wizard to help you connect Notion and Google. The first step is to connect to Notion. Choose the app you want to connect from, and select Notion. For the Event, choose “New Database Item.” After that, click “Continue.”
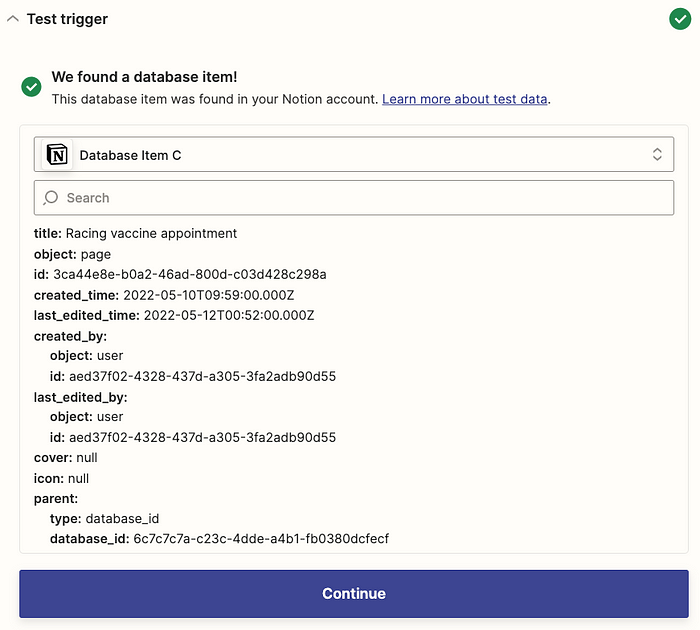
Once you’ve logged into Notion and granted permission, click “Next” to proceed to the next step. Zapier will retrieve the databases from your Notion account. Choose which database you want to use in Notion. In the “Set up trigger” step, I selected the database named “Appointment.” Then, click “Continue” to allow Zapier to test whether it can trigger correctly.

If there are no errors, Zapier will display the data from Notion for you to review. You can then click “Continue.”
The next step is to set up Google Calendar. In the “Choose app & Event” section, select Google Calendar and choose “Create Detailed Event” for the event type. After making your selections, click “Continue” to sign in to Google and choose the calendar you want to connect with Notion.

Set Up Action
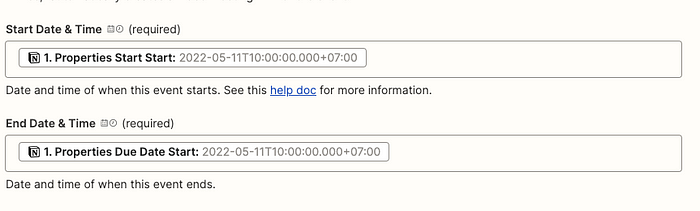
This step is crucial. We need to map the Notion database items, which Zapier will display as examples for each column *(Zapier retrieved these when we connected with Notion).

From the image above, you can see that I selected the calendar as “Birthday.” In the summary field, I mapped it to the column named “Title” in Notion. You can map the fields as you like, but be careful with the “Start Date & Time” and “End Date & Time” fields—they need to include both date and time.
Once you’ve mapped everything correctly, you can click “Test Action.” Zapier will send the Notion data to create an event in Google Calendar for you.
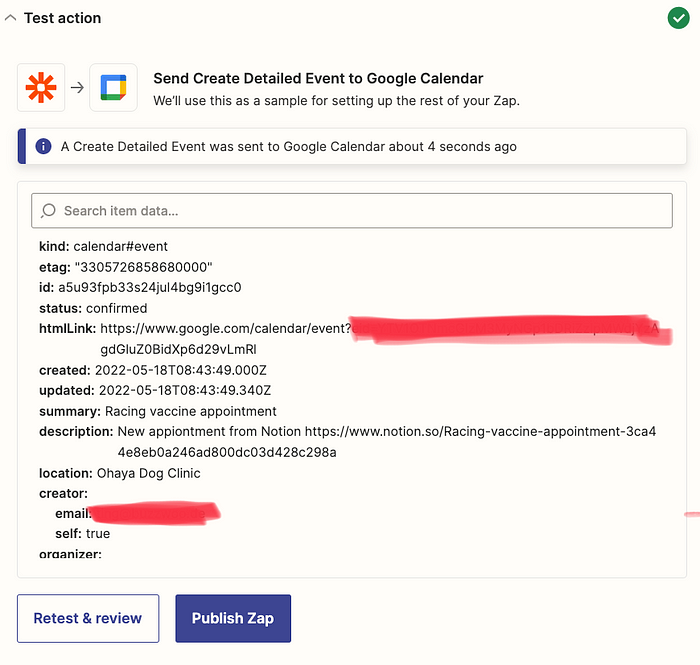
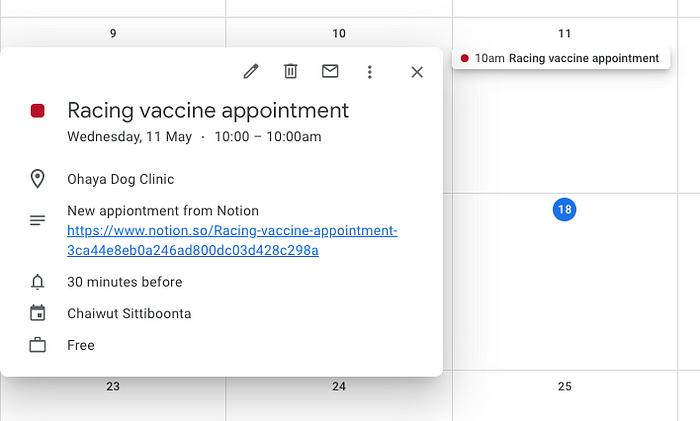
Then click “Publish Zap” to complete the setup. From now on, whenever an item is added to my “Appointment” table, Zapier will automatically create an event in Google Calendar based on the settings we’ve configured.