From QWERTY to Colemak
After using QWERTY for half my life, I’ve often considered trying a different keyboard layout. Every time I work (especially in English), I feel that the spacing between the letters doesn’t quite fit the natural positioning of my hands. So, I decided to research other layouts besides QWERTY and found that there are many options available. In the end, I decided to try three layouts:
- Dvorak
- Colemak
- Workman
These three layouts have distinctly different key placements. Now, I need to figure out which one best suits my daily life and work needs. Additionally, considering that I’ve been using QWERTY since my typewriter days, I also need to think about how long it will take to adjust to a new layout.
Which Layout to Choose?
The first requirement is minimizing the distance between frequently used keys. Since I spend all day writing code, I have to admit that my fingers often get sore, and I’ve even experienced trigger finger. This made me think that grouping frequently used keys closer together would be beneficial.
The second requirement is that some positions on the QWERTY layout work well for me, and I don’t want to change them. I frequently use special characters when coding, and some of their positions are already well-suited to how my fingers are placed, so I prefer to keep those unchanged.
Based on these two requirements, I was able to summarize my needs: I’m still somewhat attached to QWERTY, so I only want to change a few key positions. After testing with the TypingCat website to find a layout that suits my needs and is easy to transition to, I settled on Colemak.
QWERTY
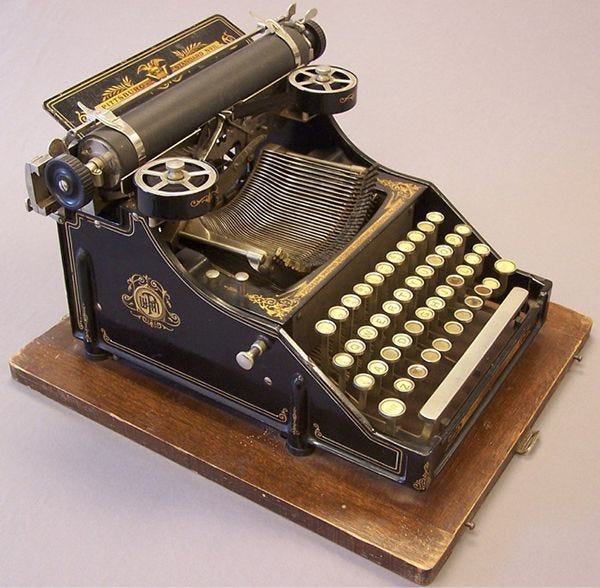
First, let’s take a look at QWERTY. The name itself comes from the first row of keys that contain the letters Q, W, E, R, T, Y arranged in sequence. It was created alongside the typewriter back in 1873.
Colemak
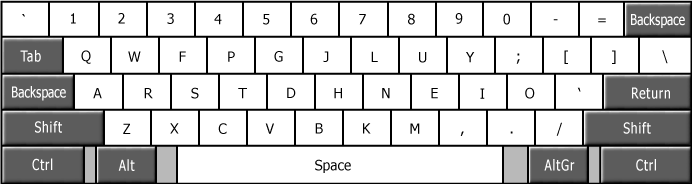
Colemak was developed by Shai Coleman in 2006 with the concept of placing the most frequently used letters in positions that can be accessed quickly by the fingers that move the fastest, such as the index and middle fingers, or in the central positions of the keyboard.
Another factor that convinced me to switch is that only 13 keys are changed from the original QWERTY layout, making the transition to Colemak easier for me. The top row, which includes numbers, remains unchanged, as do the special characters, which are still in their original positions.

Differences
After researching various websites to compare key positions, including the most frequently used keys, I used the website Patrick Wied’s Keyboard Heatmap. This tool allows us to visualize the Heatmap of key usage by trying out different text, such as:
Lorem ipsum dolor sit amet, consetetur sadipscing elitr, sed diam nonumy eirmod tempor invidunt ut labore et dolore magna aliquyam erat, sed diam voluptua. At vero eos et accusam et justo duo dolores et ea rebum. Stet clita kasd gubergren, no sea takimata sanctus est Lorem ipsum dolor sit amet. Lorem ipsum dolor sit amet, consetetur sadipscing elitr, sed diam nonumy eirmod tempor invidunt ut labore et dolore magna aliquyam erat, sed diam voluptua. At vero eos et accusam et justo duo dolores et ea rebum. Stet clita kasd gubergren, no sea takimata sanctus est Lorem ipsum dolor sit amet.
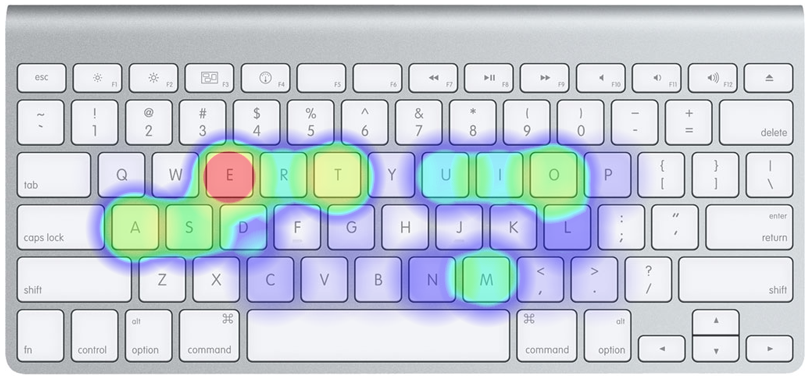
And here is the Heatmap comparison for QWERTY and Colemak.
QWERTY
Colemak
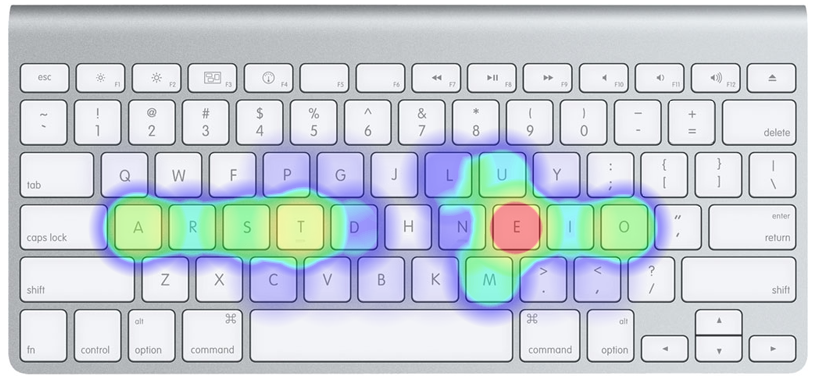
By observing the Heatmap, you can see that the most frequently used keys are T and E. In the Colemak layout, these frequently pressed keys are placed in the middle row of the keyboard, which is more accessible. This arrangement reduces the need to lift your fingers as much as with QWERTY, where you often have to move your fingers up to the top row.
Personally, I found that switching to Colemak didn’t take as long as I expected. In fact, I became more proficient and comfortable with typing. After testing it for a week, I’ve now permanently switched to Colemak.
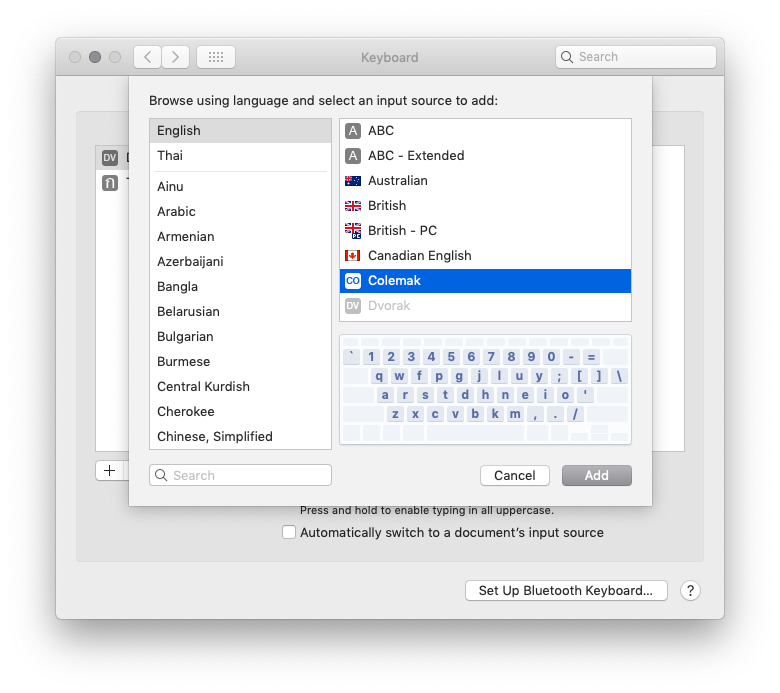
Installation
For Mac users, there’s no need to install or download any software. You can simply go to the keyboard settings and make the changes directly.